
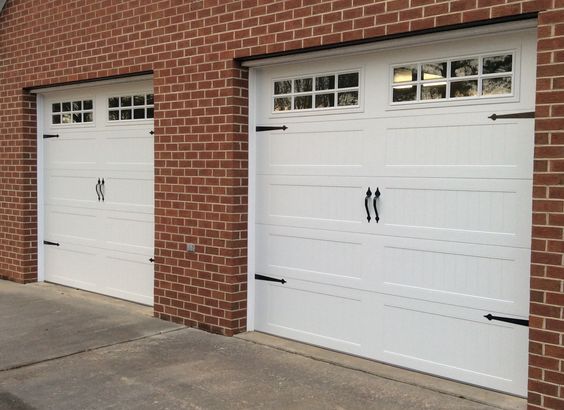
As a homeowner faced with the inevitable wear and tear of my garage door panels, the decision to embark on a garage door panel replacement project became a DIY adventure that brought both challenges and a satisfying sense of accomplishment.
In this article, I’ll share my personal journey and provide a comprehensive guide to help fellow homeowners navigate the process of garage door panel replacement. From assessing the damage to successfully installing new panels, here’s a step-by-step account of my experience and insights as stated in Garage Door Repair.
**1. Assessment and Planning: Before diving into the replacement process, a thorough assessment of the existing garage door panels is crucial. Identify the extent of the damage, whether it’s due to weathering, accidental impacts, or structural issues. Take note of the dimensions, style, and material of the existing panels to ensure a seamless replacement.
**2. Ordering Replacement Panels: Once the assessment is complete, proceed to order replacement panels. Contact the original manufacturer if possible, providing them with accurate information about your garage door model and specifications. If the original panels are no longer available, explore reputable garage door suppliers to find compatible panels that match the style and dimensions of your existing door.
**3. Gathering Tools and Materials: Before starting the replacement process, gather the necessary tools and materials. Common tools include a power drill, screwdrivers, pliers, a rubber mallet, a level, and a measuring tape. Ensure that you have all the required hardware provided with the replacement panels or purchase additional components as needed.
**4. Safety Precautions: Prioritize safety throughout the replacement project. Disconnect the garage door opener from power to prevent accidental activation. Use safety glasses and gloves when handling tools and panels. If the garage door is heavy or poses risks during the replacement process, consider seeking assistance from a partner or friend.
**5. Clearing the Work Area: Before starting the replacement, clear the area around the garage door. Remove any vehicles, tools, or obstacles that may obstruct the work. Create a clean and spacious work environment to facilitate a smooth and efficient replacement process.
**6. Removing the Damaged Panels: Begin the replacement process by removing the damaged panels. Use a power drill or screwdriver to loosen and remove the screws securing the damaged panels to the frame. Carefully detach the panels from the hinges and set them aside. Take note of the order in which the panels are removed, as this will be important during the installation of the new panels.
**7. Installing Replacement Panels: Start installing the replacement panels in the reverse order of their removal. Align the new panels with the existing hinges and secure them in place with the provided screws. Use a level to ensure that the panels are installed evenly and maintain the proper alignment. Repeat this process for each panel until the entire door is fitted with the replacements.
**8. Securing Hinges and Hardware: As you install each replacement panel, ensure that the hinges and other hardware are securely fastened. Tighten the screws using the appropriate tools, taking care not to over-tighten and risk damaging the panels or hardware.
**9. Checking Alignment: Once all replacement panels are installed, check the overall alignment of the garage door. The door should move smoothly along its tracks without any binding or unevenness. If necessary, make adjustments to the hinges and hardware to achieve optimal alignment.
**10. Testing the Garage Door: With the replacement panels securely in place, reconnect the garage door opener to power and test the door’s operation. Use the remote control or wall-mounted opener to open and close the door several times, observing for any unusual sounds or issues. Ensure that the door moves smoothly without any resistance.
**11. Applying Finishing Touches: If the replacement panels come unfinished, consider applying a protective finish or paint to match the existing panels and enhance the door’s aesthetic appeal. Allow sufficient time for the finish to dry before using the garage door.
**12. Regular Maintenance: Following the replacement, establish a routine maintenance schedule for your garage door. Inspect the panels, hinges, and hardware regularly for signs of wear or damage. Lubricate moving parts with a suitable garage door lubricant to ensure smooth operation.
**13. Seeking Professional Assistance: If you encounter challenges during the replacement process or if the garage door has complex issues, don’t hesitate to seek professional assistance. Garage door professionals have the expertise to address intricate problems and ensure a safe and effective replacement.
Challenges and Lessons Learned: Throughout my garage door panel replacement journey, I encountered a few challenges that taught me valuable lessons:
- Accurate Measurements:
- Taking precise measurements of the existing panels is crucial. Any discrepancies in size or alignment can lead to issues during installation. Use a measuring tape and double-check measurements before ordering replacement panels.
- Alignment Matters:
- Achieving proper alignment is key to the smooth operation of the garage door. Use a level and take the time to ensure that each panel is correctly aligned with the adjacent ones. This meticulous approach prevents future problems and ensures a professional-looking result.
- Patience is a Virtue:
- Garage door panel replacement is a task that requires patience and attention to detail. Rushing through the process can result in mistakes or misalignments. Take your time at each step, especially when securing hinges and hardware.
- Routine Maintenance is Essential:
- Regular maintenance is vital to the longevity and performance of the garage door. Implementing a schedule for inspections and lubrication ensures that the door operates smoothly and reduces the likelihood of future repairs.
Conclusion: A DIY Triumph in Garage Door Panel Replacement
Embarking on the journey of garage door panel replacement proved to be a challenging yet ultimately rewarding DIY project. From the initial assessment to the meticulous installation of replacement panels, the process enhanced my understanding of garage door mechanics and reinforced the importance of regular maintenance.
According to Garage Door Repair, for homeowners considering a garage door panel replacement, this hands-on guide provides a roadmap for navigating the project with confidence. Whether addressing weather-related damage or simply refreshing the appearance of your garage door, the DIY approach to panel replacement allows you to take control of the process and contribute to the overall maintenance and enhancement of your home.
Allen Gates & Garage Doors
945 Leola Ln, Allen, TX 75013, United States
214-473-5406